How to Install Jitsi Meet on Debian or Ubuntu
published 2020-03-16 (last changed on 2022-12-20) by
Installing Jitsi Meet on your own server allows you to Voice-/Videochat with multiple people and use features like screen sharing. Unlike other services it works without accounts or desktop clients — you just need to share a link with others.
certbot for SSL instead)
# Prerequisites
- an up-to-date version of Ubuntu or Debian (tested using Ubuntu 18.04 and Debian Buster)
- a running instance of Apache or Nginx
- OpenJDK
# Sources / More Information
github.com/jitsi/jitsi-meet/blob/master/doc/quick-install.md
github.com/jitsi/jitsi-meet/blob/master/doc/manual-install.md
github.com/jitsi/jicofo/blob/master/README.md#secure-domain
# Adding the apt repository
The repository is added like ever other apt repository: Create /etc/apt/sources.list.d/jitsi-stable.list and enter the
following line in it:
deb https://download.jitsi.org stable/
Afterwards add the GPG key with
$ wget -qO - https://download.jitsi.org/jitsi-key.gpg.key | sudo apt-key add -and update the repository with
$ sudo apt-get update# Add a firewall exception
If you are using ufw or another firewall software, you need to add an exception to the TCP ports 443 and 4443 and the
UDP port 10000:
$ sudo ufw allow 443/tcp # this is probably already allowed if you are runnning a webserver
$ sudo ufw allow 4443/tcp
$ sudo ufw allow 10000/udp
# Prepare the Let’s Encrypt certificate
The easiest way to set up HTTPS is by creating the SSL certificates beforehand. If you are using certbot you can do
this by running e.g.
$ sudo certbot certonly -d jitsi.yourdomain.example# Run the installer
At this point you can start the jitsi setup. At this point either Nginx or Apache have to be set up for the installer to configure everything correctly.
$ sudo apt-get -y install jitsi-meetIn the first step, the installer will ask for the domain where you want to install Jitsi: jitsi.yourdomain.example.
In the next step select that you want to use your existing certificate which you
created in the previous step
. Assuming you are using certbot, you can find the private key
at /etc/letsencrypt/live/jitsi.yourdomain.example/privkey.pem and the certificate
at /etc/letsencrypt/live/jitsi.yourdomain.example/fullchain.pem.
If all goes well you should already be able to access Jitsi at https://jitsi.yourdomain.example. Nevertheless, there
are a few more steps to make sure everything is configured ideally.
# Some more things…
# Nginx
If you are using Nginx, you can take a look at the generated /etc/nginx/sites-available/jitsi.yourdomain.example.conf and edit it to align with the configs of your other sites. You might want to adapt the ssl config or enable http2.
# NAT
If your server is not directly connected to the internet, you have to specify its local IP in /etc/jitsi/videobridge/sip-communicator.properties:
org.ice4j.ice.harvest.NAT_HARVESTER_LOCAL_ADDRESS=<Local.IP.Address>
org.ice4j.ice.harvest.NAT_HARVESTER_PUBLIC_ADDRESS=<Public.IP.Address>
# STUN Server
(thanks to kuketz-blog.de for the idea)
By default, Jitsi uses the STUN server by Google to set up a connection.
If you don’t want this, you can replace the list of STUN servers in the /etc/jitsi/meet/jitsi.yourdomain.example-config.js:
stunServers: [
    { urls: 'stun:stun.t-online.de:3478' },
    { urls: 'stun:stun.1und1.de:3478' },
    { urls: 'stun:stun.easybell.de:3478' },
],
# Screensharing and Firefox 74+
Update: This change is included in the latest version of the Debian package and is therefore not needed anymore.
Screensharing in Firefox 74+ doesn’t work. Thankfully there is a patch available and it is simple enough that one can apply it to the installed Jitsi instance.
Edit the /usr/share/jitsi-meet/libs/external_api.min.js. It is minified and quite unreadable, but one only has to search for camera; microphone; in it and then replace the string this._frame.allow="camera; microphone" with this._frame.allow="camera; microphone; display-capture".
A save and reload of the page later everything should be working fine.
# Adding authentification to room creation
You probably want to restrict the creation of new rooms to some users, but still allow everyone with the link to join a room.
For this we can configure jicofo:
First edit the /etc/prosody/conf.avail/jitsi.yourdomain.example.cfg.lua.
In the main VirtualHost, replace anonymous authentication with internal_plain. Next up create a new VirtualHost below for e.g. guest.jitsi.yourdomain.example with anonymous authentication.
Afterwards the file should look similar to this:
VirtualHost "jitsi.yourdomain.example"
        -- enabled = false -- Remove this line to enable this host
        authentication = "internal_plain"
        -- Properties below are modified by jitsi-meet-tokens package config
        -- and authentication above is switched to "token"
        --app_id="example_app_id"
        --app_secret="example_app_secret"
        -- Assign this host a certificate for TLS, otherwise it would use the one
        -- set in the global section (if any).
        -- Note that old-style SSL on port 5223 only supports one certificate, and will always
        -- use the global one.
        ssl = {
                key = "/etc/prosody/certs/jitsi.yourdomain.example.key";
                certificate = "/etc/prosody/certs/jitsi.yourdomain.example.crt";
        }
        -- we need bosh
        modules_enabled = {
            "bosh";
            "pubsub";
            "ping"; -- Enable mod_ping
        }

        c2s_require_encryption = false

VirtualHost "guest.jitsi.yourdomain.example"
    authentication = "anonymous"
    c2s_require_encryption = false
Next up, you have to edit the config.js at /etc/jitsi/meet/jitsi.yourdomain.example-config.js.
It should already have a line for anonymousdomain which you only need to uncomment and specify the domain of the new VirtualHost.
var config = {
    hosts: {
        // XMPP domain.
        domain: 'jitsi.yourdomain.example',

        // When using authentication, domain for guest users.
        anonymousdomain: 'guest.jitsi.yourdomain.example',
        // [...]
    }
}
Now we need to enable the authentification in jicofo. For this we create /etc/jitsi/jicofo/sip-communicator.properties and set it to
org.jitsi.jicofo.auth.URL=XMPP:jitsi.yourdomain.example
After every config is set, we can restart jicofo and prosody
$ sudo systemctl restart prosody.service
$ sudo systemctl restart jicofo.service
And lastly we can create users using prosodyctl:
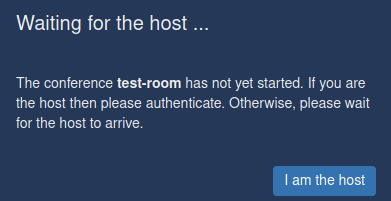
$ prosodyctl register <username> jitsi-meet.example.com <password>Now when you create a new room, you can click on I am the host and enter the username/passwort. Every following user will be able to join directly.
# Using existing user databases
As jitsi is using Prosody for this, you can use e.g. IMAP, LDAP, Wordpress and many more for authentication.
But if you just want to limit the instance to the people you know, a single shared user account as set up above might be enough.